
DIY

3 Ingredient Christmas Tree Ornaments
Deck the halls with these fun and easy homemade Christmas tree ornaments. With just 3 simple...

10 DIY Pumpkin Decorating Ideas
No matter how old you are pumpkin decorating never gets old. Get into the spirit of Halloween with...
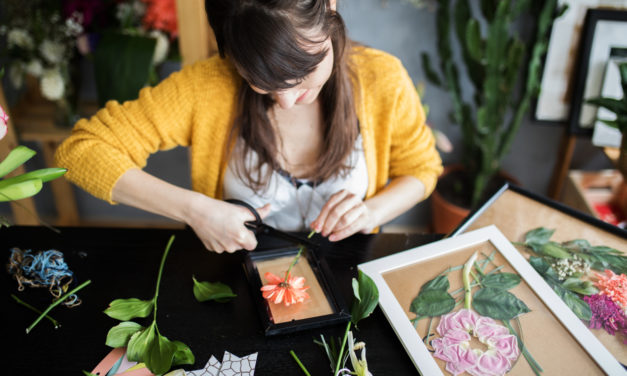
5 DIY Mountain Inspired Crafts
Bring your passion indoors with these 5 DIY mountain inspired crafts. Get ready to give your home...

8 DIY Painting Hacks
Tackle your next home improvement project without any stress or mess. Use these 8 DIY painting...
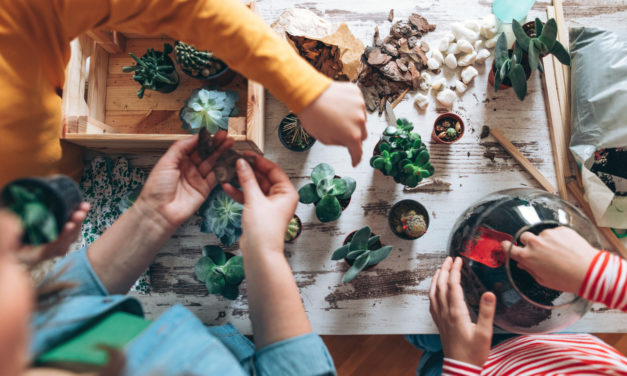
5 Easy DIY Garden Projects
Get gardening ideas that are both budget-friendly and easy for growing in smaller spaces. Here are...

5 Easy DIY Halloween Crafts
Get into the spirit of Halloween by decorating your home. Check out these 5 easy and creative DIY...

7 Easy Fall Decorating Ideas
These 7 simple and inexpensive decorating ideas are perfect for getting your home ready for the...
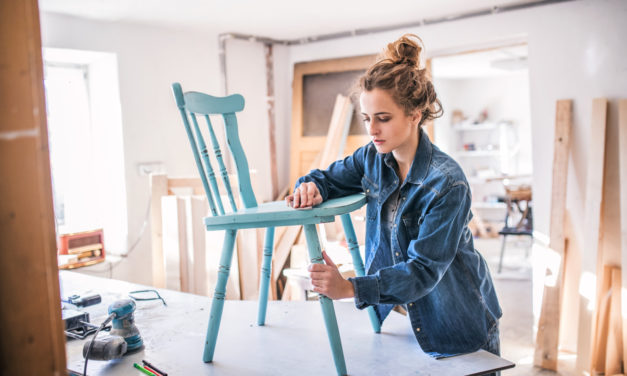
5 Renter-Friendly DIY Projects
Is your rental property lacking style? Let these 5 renter-friendly DIY projects inspire you to...

How to Clean Marks Off of Painted Walls
When my decorating clients move into newly redone homes, they worry most about damage to their pristine painted walls.
Movers, installers and other workers do their best to protect all surfaces, but a ding, smudge or scratch invariably is made somewhere.
Typically, my clients tackle the mark the way they would a scorched frying pan. They rub the spot so hard that they end up with a shiny patch that won’t go away. They’ve done what painters call burnishing. They’ve increased the paint’s gloss or sheen by rubbing the spot too much.
Burnishing is particularly easy to do on walls painted in a flat finish. So though I love the chalkiness of flat paint, I suggest using it only in less-trafficked areas such as living rooms and bedrooms.
When cleaning painted walls, the paint finish matters; the color doesn’t. Flat paint is hardest to clean but easiest to touch up. It’s also the best finish for walls that are not in great shape. Imperfections are less apparent than on glossy walls.
Walls done in a high-gloss, semigloss or satin finish are by far the easiest to clean, but they’re hard to touch up. These finishes highlight imperfections. When touched up, the difference in the new and old paint sheens is often apparent. More often these finishes are used for moldings, baseboards, window and door trim, kitchen and bath walls, or any area that gets bumped, scuffed, or is prone to dirt and grease.
Eggshell is the most popular and versatile paint finish. It has the slightest bit of sheen to make it easy to wash and touch up.
No matter the finish of your walls, the trick to cleaning them is to act quickly and gently. The sooner you take care of a scuff or splotch, the better. First vacuum the area using the brush attachment to remove any loose dust or dirt. Dampen a clean rag or nonabrasive sponge (such as a Mr. Clean Magic Eraser), squeezing out any extra water, then dab or rub the stain very gently. If that doesn’t work, dip the cloth into water mixed with a few drops of a mild dishwashing liquid. If the stain persists, try blotting a bit of the soap right onto the wall and gently rub. Once the stain is gone, gently wipe the spot with plain water to remove any soapy residue.
If spot-cleaning fails, you might be tempted to try a harsher cleaner. Test it first in a hidden spot, such as behind a piece of art on a wall. If that fails too, then you need to touch up the spot with paint. For best results, use the paint from the original paint can and use the original mode of application. If the paint was rolled on, use a roller. If it was brushed on, use a brush.
The process to repair chips, scratches or holes left by picture hooks is more involved. You will need paint, spackling paste, a small putty knife, a towel or sponge, sandpaper and a paint brush. If you don’t have leftover paint, take a small chip of paint from the damaged wall and have it color-matched at your paint or hardware store. Make sure to get the same paint finish as your wall. Mix a small amount of spackling paste until it is smooth, and using a small, flexible putty knife, apply the paste to fill the scratch or hole. Depending on the depth of the damage, this might require a couple of applications. The paste probably will get on the wall around the damaged spot, but you can easily wipe it off with a damp towel or sponge.
Allow the paste to fully dry. (Follow the drying instructions on the container.) Then lightly sand the spot with 120-grit sandpaper to even out the wall’s surface. Vacuum any dust, then lightly dab paint on the repair, in the smallest area possible. The bigger the area you repaint, the more likely the difference in old and new paint will show.

6 Ways to Limit Fire Risk with Landscaping
Fire danger is high. Our hot, windy, dry weather creates optimal conditions for wildfire to spread. You cannot fireproof your landscape, but your plantings can reduce the risk of spreading a fire and make it easier to defend your home.
Reduce fuel
Remove dry grasses, dead tree limbs and brown leaves from around your home. Do not use wood mulch next to your home. Keep woodpiles and other easily combustible materials at least 30 feet from your house.
If you have scrub oak, thin it, remove diseased trees and keep limbs at least 6 feet above any other vegetation.
Prune any branches that touch any part of your home.
If you are adding or replacing a deck or other attached structure, consider a less flammable material than wood.
Ember attacks, fire ladders
An "ember attack" can quickly spread a fire from a forest to neighborhoods. Burning twigs, pinecones and leaves can travel up to a mile in high winds and ignite a fire if they land on combustible material.
"Fire ladders" let a ground fire climb to taller vegetation. A small grass fire amid unmaintained pine trees, for example, will quickly become a conflagration when dead tree limbs touch the dried grasses. At least 6 feet of space should separate grasses and shrubs from tree limbs.
In our urban-wildland interface, we must manage our urban "forest" to reduce the risk of houses catching fire.
Consider fire-wise plants
While all plants will burn, some are more easily ignited. Consider plants’ water and resin content and their growth habits.
For a comprehensive look at fire-resistant plant selection, see Colorado State Extension fact sheet Fire Wise Plant Materials – 6.305 (extension.colostate.edu/topic-areas/natural-resources/firewise-plant-materials-6-305/).
Use rock, gravel and stepping stones to interrupt the path of fire. These non-combustible enhancements also add interest and texture to your garden.
Plants near your house should be widely spaced, in clusters rather than dense plantings. While most herbaceous plants will not substantially contribute to fire risk, good spacing reduces risk.
For more information on fire mitigation, visit the Colorado Springs Fire Department website at https://coloradosprings.gov/fire-department/page/wildfire-mitigation or call 719-385-7342.
You can have a beautiful garden and be fire safe, too.
–
When you have questions, email ask.extension.org or call 520-7684 from 9 a.m. to noon Monday-Thursday. For garden tips, visit facebook.com/ColoradoMasterGardeners.EPC

7 Tips to Declutter Your Shoe Inventory
Stop hiding your shoes. Instead, display your collection — at least the core six or eight pairs — on shelves at eye level, where you can easily see them. If clutter bells are ringing, ignore them. The secret to shoe storage is staying on top of your inventory.
“This is not about showing off. This is not about more-more-more. This is about less,” says designer Lisa Adams, who started LA Closet Design in 2007. As one of Hollywood’s go-to wardrobe gurus, she creates dream closets for celebrities such as Reese Witherspoon, Tyra Banks and Khloe Kardashian. “Shopping is impulsive. The best way to keep yourself from overspending and stockpiling crap is to make sure you can see what you already have.”
First gather all the shoes you own in one place. This includes snow boots in the car trunk, the heels in storage for weddings and funerals, and the sneakers you’ve been meaning to clean. Then divide them into two piles: shoes you’ve worn in the past year and shoes you haven’t. Everything in the latter pile should go. “It feels extreme,” Adams says, “but it’s effective.”
When Adams renovated her closet two years ago, she said, she was shocked to see how many clothing items she’d accumulated that she wasn’t using, particularly pieces with stains or tears that she’d put off having repaired. Now she gives herself two weeks to fix a piece, or it has to go.
“We’re so robotic in that we grab things from our closet, realize there’s an issue, and then we put it back,” she says. “Don’t put it back.”
Once you’ve determined which shoes you actually wear, note how frequently you wear them. Shoes worn daily or weekly should get prominent storage in the center of your closet system or entryway where they’re easy to put on and stow away. Seasonal and activity-specific shoes, such as hiking boots and formal footwear, can be stored in a garage, attic or back-closet shelf. This is where plastic or color-coded shoe bins and boxes come in handy. Although it’s less important for storage solutions to match the closet, retailers are catering to younger customers who want total coordination and control.
Jimmy Seifert, a closet department buyer for the Container Store, says wardrobe systems are becoming less of an afterthought or careless catchall. “Younger customers … in particular, want a polished, edited look,” he says. “Matching hangers, shoes on display, handbags on shelves. It’s sort of extreme minimalism, or extreme decluttering. Everything out in the open so you know exactly what you’re working with.”
To attract material-minded millennials, retailers are expanding their closet offerings to include store-inspired display cases and high-tech storage boxes. The Container Store sells plastic, drop-front containers for collectible sneakers and a box specifically sized to fit upright high heels. In April, Ikea teamed with Los Angeles streetwear designer Chris Stamp on a line of limited-edition plastic shoe boxes called Spänst. They’re a sneakerhead’s dream, monochromatic and stylishly simple, designed to look like little shipping containers with built-in showcase lights.
“We’re tuned in to what this generation wants,” says Janice Simonsen, a design spokeswoman for Ikea North America, “which is to feel proud of their shoes without going too loud or bulky.”
For her custom closets, Adams draws inspiration from high-end boutiques and dressing rooms where elegant lighting and a tidy aesthetic instantly put shoppers at ease. “It’s relaxing, but more importantly, it makes you want to wear what’s on the rack,” she says. “Why wouldn’t that also work at home?” Some of her favorite closet-design techniques, such as LED-lit shoe walls and jewelry display cases, elevate the homeowner’s collection and make them excited to wear it.
“I know it sounds over-the-top, but it’s rooted in practicality, in using what you already have,” she says. “Buying shoes and then tossing them into a bin to be forgotten, that feels crazy to me.”
How you store and display your shoes comes down to how much space you have. People with walk-in closets or a garage for seasonal storage have more options than those in a city apartment. But thoughtful, creative organization can make even the smallest closet feel surprisingly powerful. Which is to say: It isn’t how big the closet is; it’s how you use it.
Here are seven tips to save yourself from drowning in shoes:
1. Make the most of your garage. Simonsen recommends designating a landing area for athletic and seasonal shoes near your sports equipment so they’re “easy to grab and go.” Baskets are handy for families that need extra compartmentalizing.
2. Keep your entryway tidy with a storage bench or stylish shoe cabinet. Shoe cabinets are particularly handy for those who don’t allow shoes in the house. Most pieces double as a console table or bench.
Products: Calvin shoe cabinet ($189.99) or Coolidge shoe cabinet ($153.99), both from target.com; Margaret modern and contemporary shoe bench ($81.19, home depot.com); Prepac Monterey shoe storage cubby ($129.99, homedepot.com) or Prepac horizontal shoe cubby bench ($239.99, target.com).
3. Protect special or collectible shoes in clear plastic boxes. Serious shoe lovers who want to store and maintain their footwear should have stackable shoe boxes, which are sold in transparent plastic for easy visibility. “We sell wipes, cleaners, even charcoal bags to prevent odors,” Seifert adds. “It’s a passion.”
4. Try a trundle-style storage rack. If the rest of your bedroom is at capacity, create your own makeshift storage bed with an under-bed shoe rack. Bonus points if it’s on wheels.
Products: Rebrilliant rolling under-bed shoe rack ($23.99, wayfair.com); tweed 16-pair under-bed shoe organizer ($19.99, containerstore.com).
5. Display everyday shoes on a bookcase, floating shelves or vanity. Fashion blogs are full of fun ideas, but it’s hard to beat the elegance of a simple vertical bookcase, a cheap alternative to built-ins. Place shoes you don’t want to see, such as flip flops and workout shoes, on a shelf inside your closet.
6. Upgrade your over-the-door shoe rack. They may be polarizing, but you can’t deny that over-the-door shoe racks do wonders with vertical space. Use a grown-up option that doesn’t feel pulled from a college dorm.
Product: Gunmetal over-the-door shoe rack ($39.99, containerstore.com).
7. Keep kids’ shoes at eye-level. Simonsen shares three words for effective children’s shoe storage: “Make it easy.” Think low, compartmentalized storage bins or units with benches so they can sit while they take their shoes on and off.
Product: Trofast storage combination ($66.99, ikea.com).
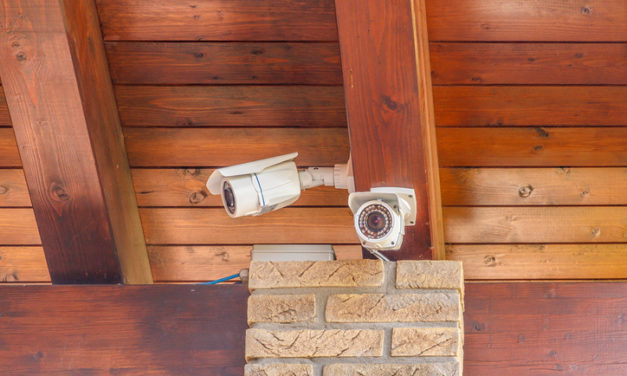
3 Do-It-Yourself Home Security Options
In 2016, the U.S. had more than 1 million home burglaries, the FBI reports. That equates to a burglary about every 30 seconds.
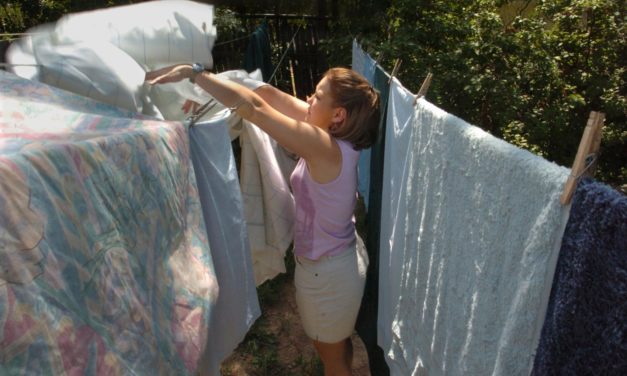
Stay Eco-Friendly with Clotheslines
My fascination with clotheslines began when, as a child, I would airplane my arms and soar between...
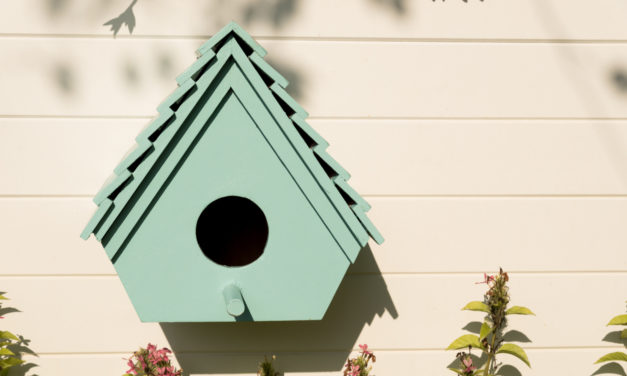
5 Tips for Creating a Safe Birdhouse
If you have a birdhouse, prepare for guests. With warmer weather around the corner, our feathered friends are seeking out places to build their nests.
"Now is a good time," says Steve Nelson, of the Wild Bird Center in Alexandria, Va. "But you can start as early as February, especially for house sparrows."
Other things to keep in mind for birdhouses:
• Make sure there is a hole for venting hot air, another for draining rainwater and a panel that opens and closes for cleaning.• Clean them at least once a year. Birds won’t nest in houses not clear of last year’s litter.
• Don’t put nesting material inside. Leave it outside the house and let birds find it themselves.
• Place them four to six feet above the ground. Not only do birds like that height, but the shorter distance to the ground is easier on fledglings during their first flight.
• Face them south to southeast for warming sun.
• If a house is made of metal, hang it in a shady area. Otherwise it will absorb sunlight and make the inside too hot.• A yard with shrubs and bushes is bird-friendly. Birds like to have safe zones for cover if they think a hawk is flying by. Colorado Master Gardeners offer many ideas to landscape a yard with bird in mind, read it here.
• Birdhouses with perches can encourage predators, such as cats, squirrels and larger birds, to get a foothold inside.• Try to place birdhouses where you can see them, maybe from a kitchen window.
